| Installation and Administration | Getting Started | Command Line | Configuration | Eclipse Plugin | Reference Manual | API |
| Show on single page Show on multiple pages |
|
|
|
|
This section describes the possible scenarios for installing Squore on windows.
If you use all the default settings, the installer will deploy the following components in the specified locations:
<SQUORE_HOME> is %SYSTEMDRIVE%\Squoring\squore-server and contains Squore Server and its dependencies, including
dedicated distributions of:
Strawberry Perl 5.12.3.0 Portable
PostgreSQL 9.6.7 Portable
Tcl 8.5 for Windows 8.5.12
PhantomJS 2.1.1
WildFly 10.1.0
<SQUORE_DATA> is %SYSTEMDRIVE%\Squoring\squore-data and consists of the following subfolders:
The Squore database in <SQUORE_DATA>\cluster
The Squore database backup directory in <SQUORE_DATA>\backup
The Squore project data directory in <SQUORE_DATA>\projects
The Squore temporary data directory in <SQUORE_DATA>\temp
The Squore temporary source code directory in <SQUORE_DATA>\temp\sources
The Squore workspace directory in <SQUORE_DATA>\workspace
The installer provides options to:
use a different installation folder
use a specific path for temporary data and project data
use a specific path for the local PostgreSQL cluster and backup folder
use an existing local PostgreSQL instance
use a remote PostgreSQL or Oracle database
use your own perl distribution
The data and temporary folders must be excluded from the scope of virus scanners, malware protectors and search indexers to avoid any errors during an analysis.
In order to start installing Squore, log on with an account that has administrator privileges and launch the Squore installer (squore-18.0.18-windows-x86_64.msi). Each of the wizard screens is documented below in the order that you will see them.
Running the Windows installer generates a log file in <SQUORE_HOME>\install.log, which you can consult if you think there is an issue with your installation.
When an installation or upgrade fails, the operation is rolled back in an attempt to remove all files in the selected installation folder. When this happens, the log file
can be found in %LOCALAPPDATA%\Temp\install.log instead.
The Squore installer Welcome screen
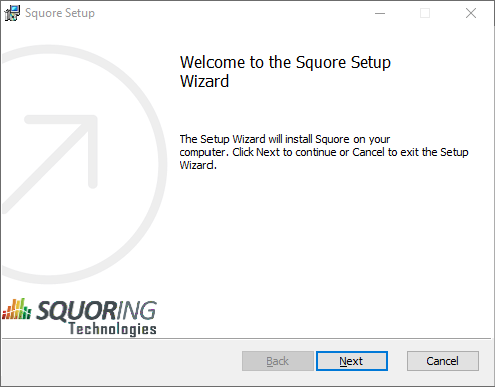
The Squore installer Welcome screen
On the Welcome screen, click the Next button to start the installation.
The Squore Licence Agreement screen
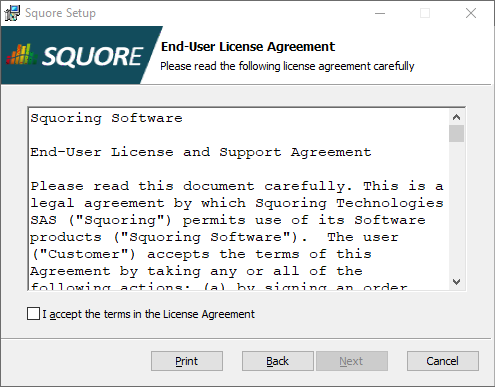
The Squore Licence Agreement screen
Review and accept the Licence Agreement, then click the Next button to continue with the installation.
Squore Server Destination Folder screen
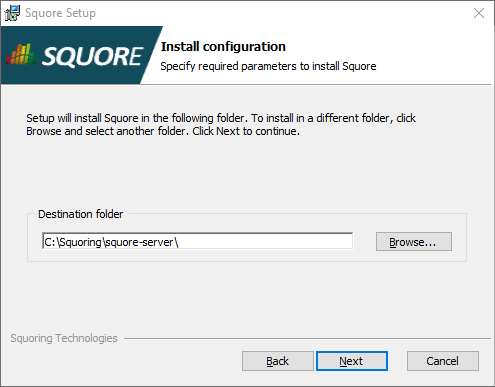
Squore Server Destination Folder screen
The Destination Folder screen allows you to select the Squore installation folder, where the application server will be installed. If you choose the path of an existing Squore installation, the installer will offer to upgrade this existing installation. Note that you should back up your data before you attempt to upgrade a Squore installation.
The steps to follow in order to upgrade an existing installation are described in the section called “Upgrading from a Previous Version”. The rest of the current chapter describes the procedure for a new installation.
Check that the location suggested by the Squore installer is appropriate. If not, use the Browse... button to select another location.
After specifying the Destination Folder, click on the Next button.
The Feature Selection screen
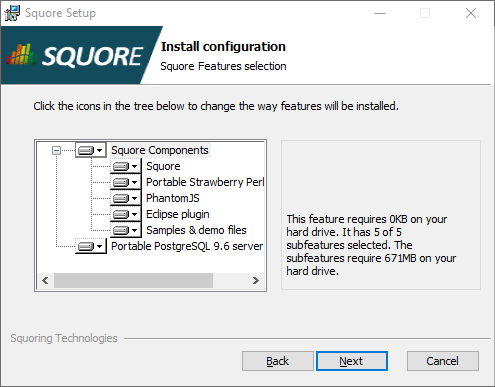
The Feature Selection screen
The Components screen allows you to choose the components of Squore that will be installed.
If you are unsure which components are needed on your system, you can safely leave all of them selected and then, click the Next button.
The General Options screen
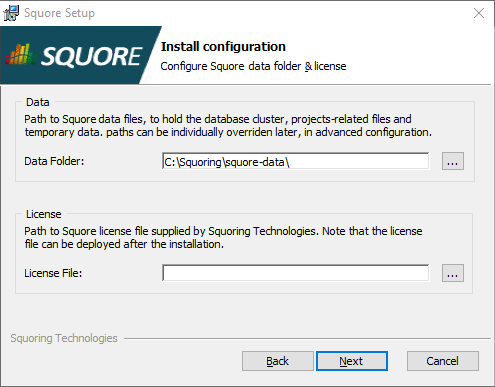
The Data Folder and Licence screen
The Squore Data Folder and Licence screen allows specifying where Squore stores its data and which licence file is used for the installation.
Data Folder: The data folder is the main folder where the data generated by Squore will be stored. Define a path on your system to hold the data. By default, the database cluster, the temporary folder, the project data, the configuration workspace and the default backup folder will live in this location. Note that you can refine each individual location later by going through the advanced option screens of the installation wizard.
Licence File: The location of the Squore licence file you wish to use for your installation. Note that you can leave this field empty at this time and provide the licence information only after the installation procedure has finished. This is explained in further details in the section called “Updating the Squore Licence File”.
After specifying the data location and optionally pointing to a licence file, click the Next button.
The Server Configuration screen
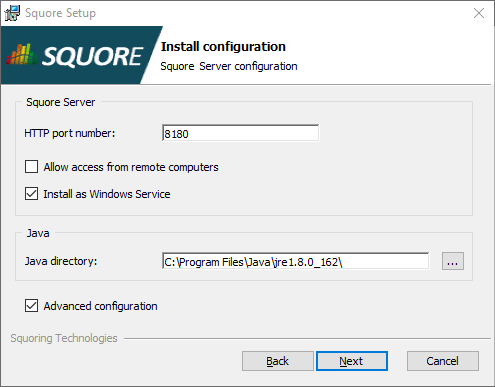
The Server Configuration screen
The Server Configuration screen allows specifying the rest of the necessary, basic options for your installation.
HTTP port number: Define the port used to access Squore from your browser.
Allow access from remote computers: Check this box to allow other computers on your network to connect to the Squore installation from a web browser. This setting is off by default to provide a safe installation that is only accessible from the server machine itself. The value can be changed after the installation process finishes by following the steps detailed on http://openwiki.squoring.com/openwiki/index.php/Connect_remotely_to_the_server.
Install as Windows service: Check this box if you want to be able to start and stop Squore Server using a Windows service. You can optionally customise the service name when clicking the Next button.
Java directory: the directory where the Oracle JRE is installed. The wizard should have found the appropriate Java installation on your server, but you can modify the value if the JRE you want to use is in a different location using the ... button. Note that Java 8 (other versions are not supported) is required (see the section called “Installation Prerequisites”).
Advanced configuration: Check this box to see more installation options for advanced users. Advanced options include finer control over data folder locations, memory settings, and advanced database configuration (like using a remote PostgreSQL installation or an Oracle database).
After setting your preferences, click the Next button to view a summary of your installation settings (step 14) or proceed with the advanced configuration options (step 7).
The Advanced Squore configuration screen
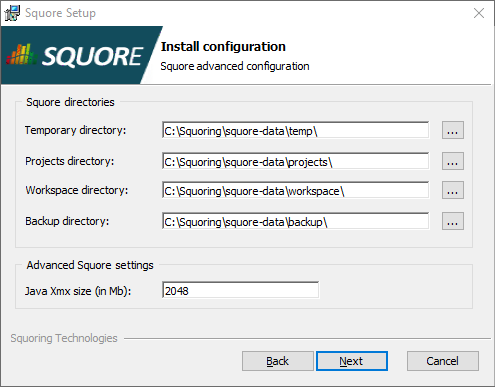
The Advanced Squore configuration screen
This screen is only displayed if you checked the Advanced configuration box in step 6.
On the Advanced configuration screen, you can modify the default work directory and memory and performance settings for the server.
Temporary directory: The location of the temporary data generated by Squore.
Projects directory: The location of the data generated by Squore when running analyses on the server.
Workspace directory: The location where changes to your analysis models and dashboards made in the web interface are stored on disk.
Backup directory: The location used to store backups when the backup script is launched. For more details about backing up your Squore data, see the section called “Backing-Up the Squore Data”
Java Xmx size (in Mb): The maximum amount of RAM available to Squore Server, set to 25% of the physical RAM available on your server by default. It is recommended to keep the memory allocated to Squore under 25% of the total physical RAM so that other Squore modules (especially the database) or external processes (the OS and some Data Providers like Checkstyle or FindBugs) still have enough resources available. This setting can be changed after installation by following the procedure described in the section called “Changing the Java Heap Size”.
The Perl selection screen
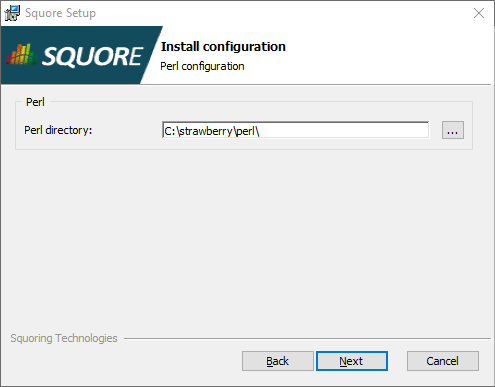
The Perl selection screen
This screen is only displayed if you disabled the installation of Strawberry Perl 5.12.3.0 Portable box in step 4.
On the Perl selection screen, you can modify the path to the Perl distribution that will be used by Squore Server. Use the ... button to specify the Perl installation folder and click the Next button to continue.
The Database Type screen
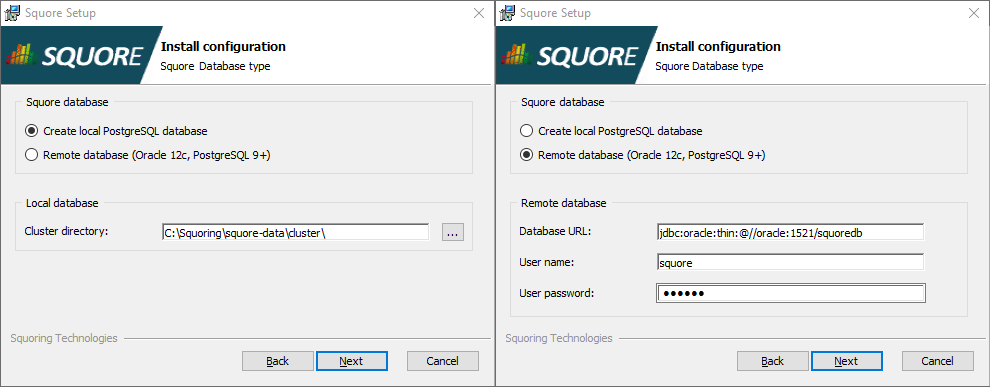
The Database Type screen options for local and remote databases
On the Database Type screen, you can specify if your Squore Server installation should use a local PostgreSQL cluster or a database on a remote DBMS.
In order to use a local PostgreSQL cluster, modify the path to the PostgreSQL installation that will be used by the installer to create the Squore database. Use the ... button to specify the installation folder and click the Next button to continue.
In order to use a remote database backend, specify its URL and provide the username and password of a dedicated user for the Squore installation.
The syntax for the database URL is:
jdbc:oracle:thin:@//host:port/sid for Oracle
jdbc:postgresql://host:port/dbname for PostgreSQL
Click the Next button to continue, after making sure that the database URL and credentials are correct.
The PostgreSQL selection screen
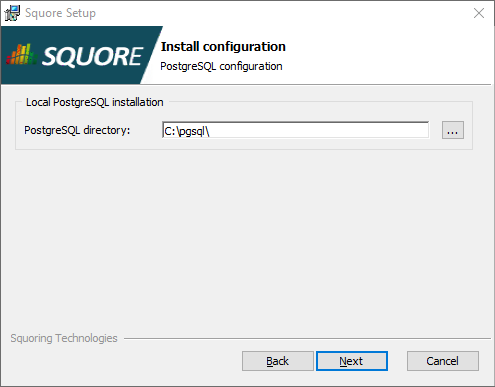
The PostgreSQL selection screen
This screen is only displayed if you disabled the installation of PostgreSQL box in step 4.
On the PostgreSQL selection screen, you can modify the path to the local PostgreSQL installation that will be used by Squore Server. Use the ... button to specify the PostgreSQL installation folder and click the Next button to continue.
The PostgreSQL server configuration screen

The PostgreSQL server configuration screen
This screen is only displayed if you checked the Advanced configuration box in step 6 and are using a local PostgreSQL database.
On the PostgreSQL server configuration screen, you can provide details about the PostgreSQL server to be used with Squore Server
Server's host: the hostname of the machine running the PostgreSQL server
Server's port number: the running port of the PostgreSQL server
Administrator user name: the user name of the PostgreSQL server admin user
Note that the Administrator password cannot be set. After adjusting your settings, click the Next button to continue.
The Squore database configuration screen
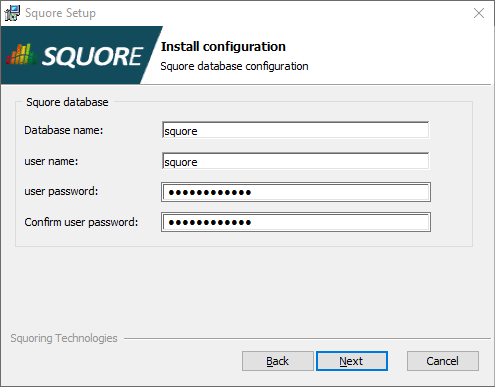
The Squore database configuration screen
This screen is only displayed if you checked the Advanced configuration box in step 6 and are using a local PostgreSQL database.
On the Squore database configuration screen, you can specify the desired name and user for the Squore database:
Database name: the name of the database that will be created for this installation of Squore
user name: the name of the user that will be created as the owner of the database
user password: the password for the specified database user
After adjusting your settings, click the Next button to continue.
The WildFly and PhantomJS Configuration screen
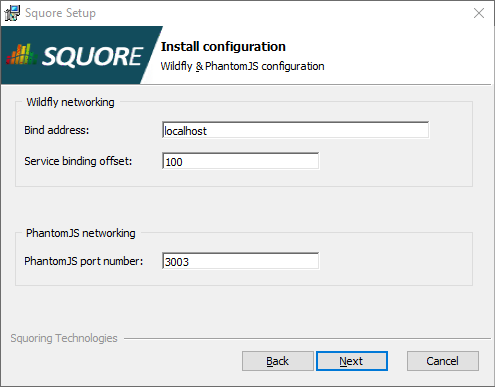
The WildFly and PhantomJS Configuration screen
This screen is only displayed if you checked the Advanced configuration box in step 6.
On the WildFly and PhantomJS Configuration screen, you can specify the desired bind address and ports for Squore Server, as well as the port to use for the PhantomJS server:
Bind address: the bind-address configuration for the WildFly Server
If you want to restrict access to Squore Server from the server itself, leave localhost. If you want your server
to be accessible from anywhere on your network, set the bind address to 0.0.0.0.
Service binding offset: the offset added to the value of the default WildFly ports (as described on https://docs.jboss.org/author/display/WFLY10/Interfaces+and+ports#Interfacesandports-SocketBindingGroups) for this installation of Squore, resulting in the following ports being assigned for the following offset values:
100 (default): http: 8180, https: 8543, management: 10090
200: http: 8280, https: 8643, management: 10190
300: http: 8380, https: 8743, management: 10290
The offset is mainly used to install several instances of Squore using different ports on the same machine, or to configure
the installation to use a different pour when 8180 is already by another application used on the machine.
PhantomJS port number: Choose the port used for the PhantomJS server. Not that all communication between Squore Server and PhantomJS happens on the same machine. This port therefore does not need to be open on your firewall, except in very specific scenarios described in the section called “Advanced PhantomJS Settings”.
After adjusting your settings, click the Next button to continue.
The Windows Service screen
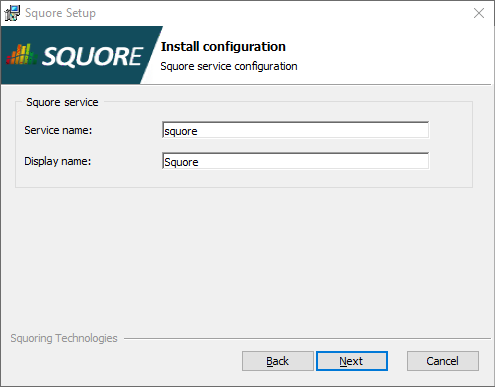
The Windows Service screen
This screen is only displayed if you checked the Install as Windows service box in step 6.
On the Windows Service screen, you can specify the desired name and display name for service that controls Squore Server.
For a Windows Service, the name is the alias used in the command line (for example: net start squore),
and the display name (Squore) is the name displayed in the graphical Windows Services Console.
Set the name and display name for the service according to you needs and click the Next button to continue.
The Confirmation screen
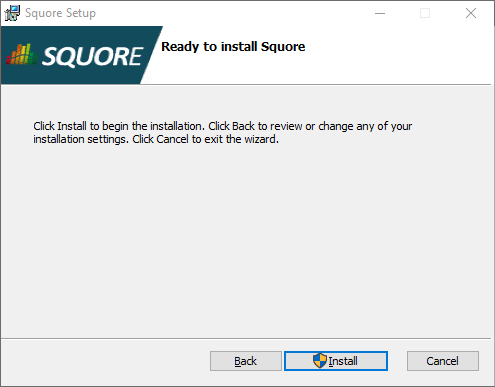
The Confirmation screen
The Confirmation screen is the last screen displayed before the installation starts. Go back and verify your selections if needed, otherwise click Install to start installing Squore. The installation process lasts a few minutes.
The Installation progress screen
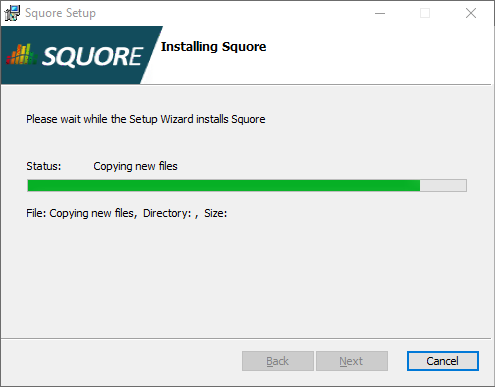
The Installation progress screen
During the installation, a progress bar is displayed while files are copied to your hard drive.
The installation cannot be cancelled after it has started.
The Squore installation completed screen
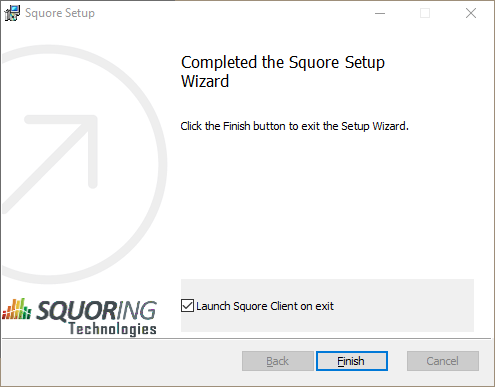
The Squore installation completed screen
When the installation completes, the installation completed screen is displayed. Click the Finish button to close the Squore Installation Wizard. You can use the Start Client shortcut on your desktop to open the Squore Login page in your browser.
If you check the Launch Squore Client on exit box on this screen, Squore will open automatically in your browser.
Squore is now ready for use and can be accessed via
http://localhost:8180/SQuORE_Server
. Refer to Chapter 4, Starting and Stopping Squore if you need more information about how to start and stop Squore and, if applicable, change the default configuration.