| > Show on single page > Show on multiple pages |
This section describes the possible scenarios for installing Squore on windows.
If you use all the default settings, the installer will deploy the following components in the specified locations:
%SYSTEMDRIVE%\Squoring\squore-server<INSTALLDIR>\tools\perl%SYSTEMDRIVE%\Squoring\squore-data\cluster%SYSTEMDRIVE%\Squoring\squore-data\backup%SYSTEMDRIVE%\Squoring\squore-data\projects%SYSTEMDRIVE%\Squoring\squore-data\temp%SYSTEMDRIVE%\Squoring\squore-data\temp\sourcesThe installer provides options to modify the locations of the installation directory as well as the path to the temporary data, project data, cluster and backup folder. You can also choose to use an already existing PostgreSQL instance and your perl distribution, provided that it meets the requirements mentioned earlier.
The data and temporary folders must be excluded from the scope of virus scanners, malware protectors and search indexers to avoid any errors during an analysis.
When an error occurs during the installation, the installer wizard remains open and display the log file of the installation, as shown on the screenshot below. When this happens, review the contents of the installer window, and if necessary, copy and send the contents to support@squoring.com.
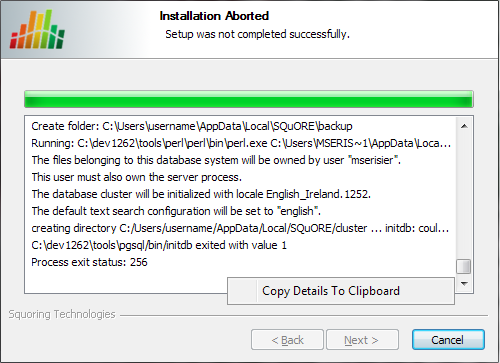
The Installation Aborted screen
In order to start installing Squore, log on with an account that has administrator privileges and launch the Squore installer. Each of the wizard screens is documented below in the order that you will see them.
The Squore installer Welcome screen
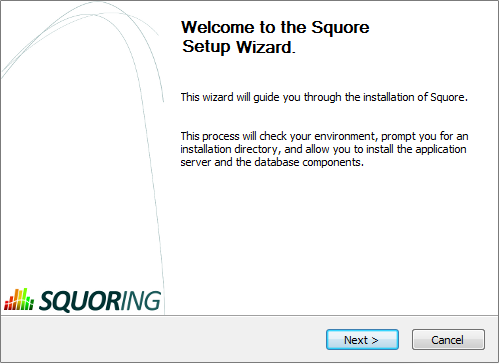
The Squore installer Welcome screen
On the Welcome screen, click the Next > button to start the installation.
The Squore Licence Agreement screen
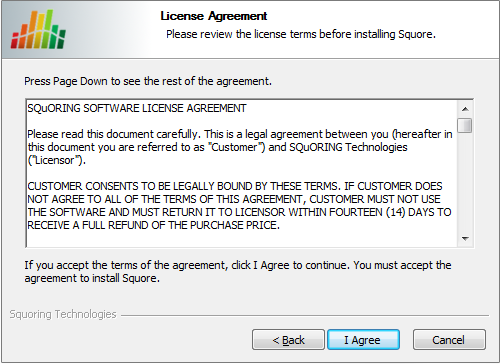
The Squore Licence Agreement screen
Review the Licence Agreement and click I Agree to accept the terms of the agreement and continue with the installation.
Squore Server Destination Folder screen
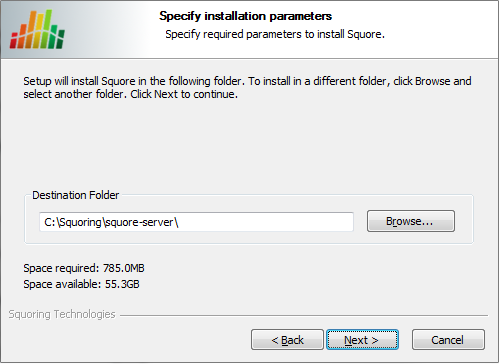
Squore Server Destination Folder screen
The Destination Folder screen allows you to select the Squore installation folder, where the application server will be installed. If you choose the path of an existing Squore installation, the installer will offer to upgrade this existing installation. Note that you should back up your data before you attempt to upgrade a Squore installation.
The steps to follow in order to upgrade an existing installation are described in the section called “Upgrading from a Previous Version”. The rest of the current chapter describes the procedure for a new installation.
Check that the location suggested by the Squore installer is appropriate. If not, use the Browse... button to select another location.
After specifying the Destination Folder, click on the Next > button.
The Squore Components screen
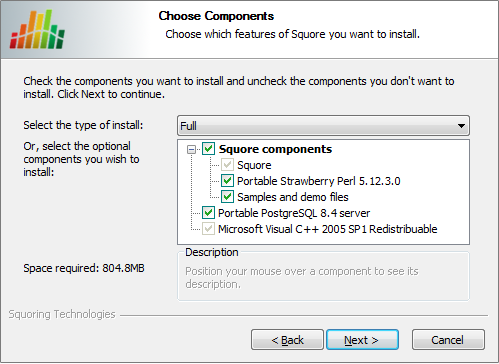
The Squore Components screen
The Components screen allows you to choose between the three available types of installations:
Full: all components will be installed
Minimal: only Squore Server will be installed. Use this mode if a PostgreSQL server and a distribution of the Perl scripting environment are already available on the server
Custom: you define which components will be installed using the checkboxes on the Choose Components screen
If you are unsure which option is the best for you, you can safely use the Full installation, so that all Squore components are installed locally.
Select the appropriate installation mode. Then, click the Next > button.
The General Options screen
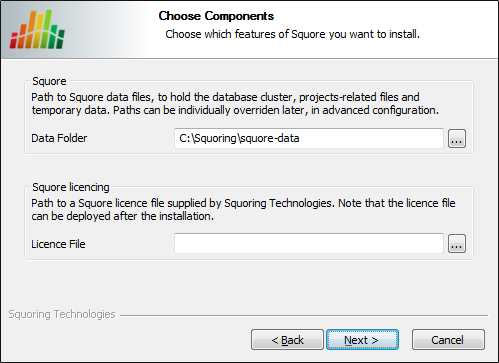
The General Options screen
The Squore General Options screen allows specifying where Squore stores its data and which licence file is used for the installation.
Data Folder: The data folder is the main folder where the data generated by Squore will be stored. Define a path on your system to hold the data. By default, the database cluster, the temporary folder, the project data and the default backup folder will live in this location. Note that you can refine each individual location later by going through the advanced option screens of the installation wizard.
Licence File: the location of the Squore licence file you wish to use for your installation. Note that you can leave this field empty at this time and provide the licence information only after the installation procedure has finished. This is explained in further details in the section called “Updating the Squore Licence File”).
After specifying the data location and optionally pointing to a licence file, click the Next > button.
The Squore Additional Options screen
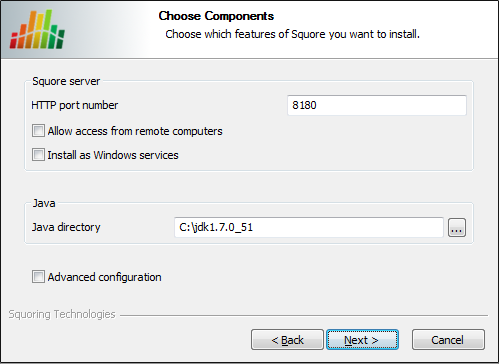
The Squore Additional Options screen
The Squore Additional Options screen allows specifying the rest of the necessary, basic options for your installation.
HTTP port number: Define the port used to access Squore from your browser.
Allow access from remote computers: Check this box to allow other computers on your network to connect to the Squore installation from a web browser. This setting is off by default to provide a safe installation that is only accessible from the server machine itself. The value can be changed after the installation process finishes by following the steps detailed on http://openwiki.squoring.com/openwiki/index.php/Connect_remotely_to_the_server.
Install as Windows services: Check this box if you want the Windows services
to be installed, and optionally customise their names when clicking the Next > button. After the installation completes, you will be able to manage
the PostgreSQL 8.4 Server and JBoss Application Server 7.1.1 services from the Windows Services Console or from
the command line using net start|stop PG84SVC and
net start|stop JBAS71SVC.
The services can also be installed after running the wizard, refer to the section called “Running Squore as a Service” for more details.
Java directory: the directory where the Oracle JDK or JRE is installed. The wizard should have found the appropriate Java installation on your server, but you can modify the value if the JDK you want to use is in a different location using the ... button. Note that Java 1.6.0_45 or higher is required and that Java 1.8 is not supported (see the section called “Installation Prerequisites”).
Advanced configuration: Check this box to see more installation options for advanced users. Advanced options include finer control over data folder locations, memory settings, and advanced database settings.
After setting your preferences, click the Next > button to view a summary of your installation settings (step 14) or proceed with the advanced configuration options (step 7).
The Advanced Squore settings screen
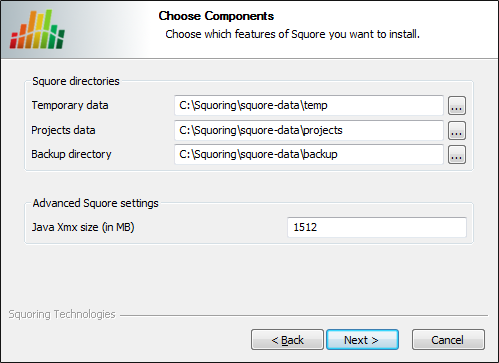
The Advanced Squore settings screen
This screen is only displayed if you checked the Advanced configuration box in step 6.
On the Advanced Squore settings screen, you can modify the default work directory and memory and performance settings for the server.
Temporary data: The location of the temporary data generated by Squore.
Projects data: The location of the data generated by Squore when running analyses on the server.
Backup directory: The location used to store backups when the backup script is launched. For more details about backing up your Squore data, see the section called “Backing-Up the Squore Installation”
Java Xmx size (in MB): The maximum amount of RAM available to Squore Server, set to 25% of the physical RAM available on your server by default. It is recommended to keep the memory allocated to Squore under 25% of the total physical RAM so that other Squore modules (especially the database) or external processes (the OS and some Data Providers like CheckStyle or Findbugs) still have enough resources available.
The Local Perl installation screen
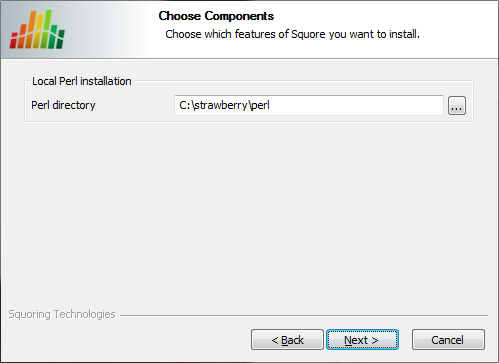
The Local Perl installation screen
This screen is only displayed if you disabled the installation of Portable Strawberry perl box in step 3.
On the Local Perl installation screen, you can modify the path to the Perl distribution that will be used by Squore Server. Use the ... button to specify the Perl installation folder and click the Next > button to continue.
The Local PostgreSQL installation screen
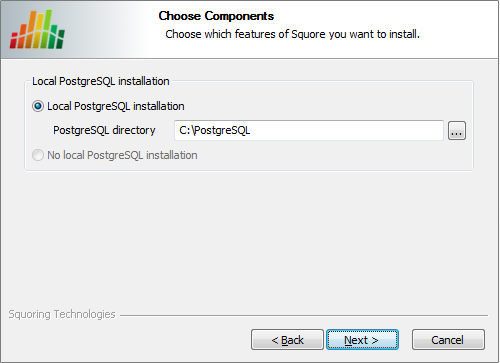
The Local PostgreSQL installation screen
This screen is only displayed if you disabled the installation of Portable PostgreSQL box in step 3.
On the Local PostgreSQL installation screen, you can modify the path to the PostgreSQL installation that will be used by the installer to create the Squore database. Use the ... button to specify the installation folder and click the Next > button to continue.
The PostgreSQL cluster configuration screen

The PostgreSQL cluster configuration screen
This screen is only displayed if you checked the Advanced configuration box in step 6.
On the PostgreSQL cluster configuration screen, you can instruct the installer to create a new cluster to create the Squore database, or use an existing one that you may have installed separately.
Create PostgreSQL cluster: Specify the path of the PostgreSQL cluster to create. Use the ... button to specify the path.
Use existing PostgreSQL cluster: Skip the cluster creation. The installer will find the running cluster using information specified in the next screen of the wizard to create the Squore database.
Note that in both cases, the Squore installer will create the Squore database where instructed. The difference between both options is whether the cluster hosting the database is also created or not. After making your selection, click the Next > button to continue.
The PostgreSQL server configuration screen
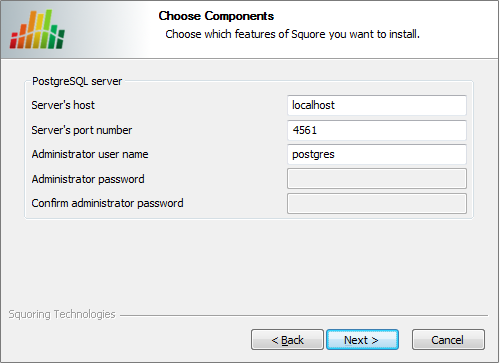
The PostgreSQL server configuration screen
This screen is only displayed if you checked the Advanced configuration box in step 6.
On the PostgreSQL server screen, you can provide details about the PostgreSQL server to be used with Squore Server
Server's host: the hostname of the machine running the PostgreSQL server
Server's port number: the running port of the PostgreSQL server
Administrator user name: the user name of the PostgreSQL server admin user
Note that the Administrator password cannot be set. After adjusting your settings, click the Next > button to continue.
The Squore database screen
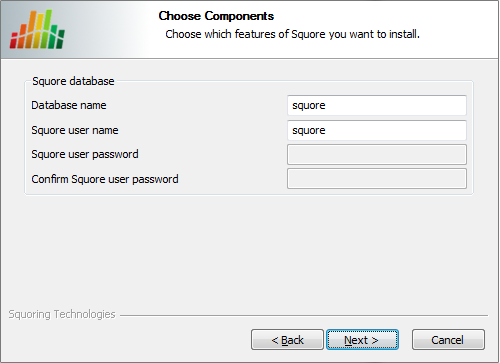
The Squore database screen
This screen is only displayed if you checked the Advanced configuration box in step 6.
On the Squore database screen, you can specify the desired name and user for the Squore database:
Database name: the name of the database that will be created for this installation of Squore
Squore user name: the name of the user that will be created as the owner of the database
Note that the database password cannot be set manually. After adjusting your settings, click the Next > button to continue.
The JBoss AS networking screen

The JBoss AS networking screen
This screen is only displayed if you checked the Advanced configuration box in step 6.
On the JBoss AS networking screen, you can specify the desired bind address and ports for Squore Server:
Bind address: the bind-address configuration for the JBoss Server
If you want to restrict access to Squore Server from the server itself, leave localhost. If you want your server
to be accessible from anywhere on your network, set the bind address to 0.0.0.0.
Service binding offset: the offset added to the value of the default JBoss ports (as described on https://docs.jboss.org/author/display/AS71/Interfaces+and+ports#Interfacesandports-SocketBindingGroups) for this installation of Squore, resulting in the following ports being assigned for the following offset values:
100 (default): http: 8180, remoting: 4547
200: http: 8280, remoting: 4647
300: http: 8380, remoting: 4747
The offset is mainly used to install several instances of Squore using different ports on the same machine.
The remoting port is used to share a licence server between multiple installations, as described in the section called “Connecting to a Remote Licence Server”.
After adjusting your settings, click the Next > button to continue.
The Installation details screen
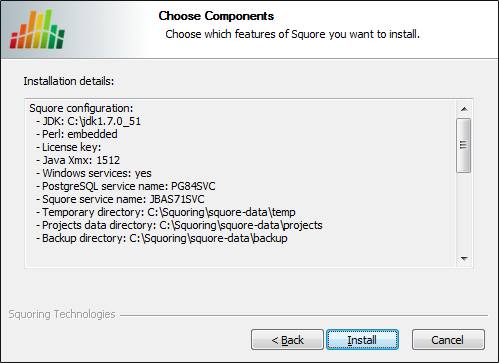
The Installation details screen
The Installation details screen shows a summary of the parameters you specified in previous steps of the wizard. Verify that the information matches your selections and click Install to start installing Squore. The installation process lasts a few minutes.
The Installation progress screen
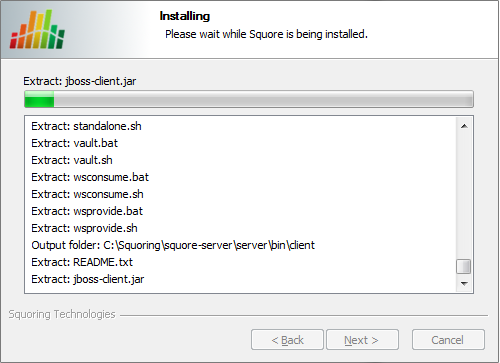
The Installation progress screen
During the installation, a progress bar is displayed while files are copied to your hard drive.
The installation cannot be cancelled after it has started.
The Squore installation completed screen
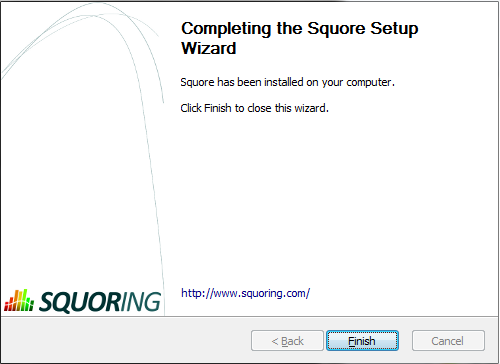
The Squore installation completed screen
When the installation completes, the installation completed screen is displayed. Click the Finish button to close the Squore Installation Wizard.
Squore is now ready for use. Refer to the next section to learn how to launch Squore and, if applicable, change the default configuration.