| > Show on single page > Show on multiple pages |
It is possible to extract some elements from the Squore dashboard and integrate them into a Confluence page. This section details how to configure Squore Server and Confluence to trust each other and how to extract the URLs to display charts.
In order to allow Confluence to connect to Squore Server:
Edit <INSTALLDIR>/server/standalone/configuration/standalone.xml
Add a new login-module
element, as shown below:
<security-domain name="squore-server" cache-type="default">
  <authentication>
  (...)
  <login-module code="com.squoring.squore.server.security.TrustedLoginModule" flag="sufficient"/>
Restart Squore Server to take the new configuration into account.
Because Confluence does not offer a single sign-on mechanism or authentication delegation, Confluence has to connect to Squore without using a password. This does not, however constitute a security risk, as the Squore user still has to exist and be allowed to view the target project in order for any information to be retrieved.
In order to allow Confluence users to add Squore elements, a Confluence administrator can create a macro to make it easier to include Squore elements into a page. You can find an example macro below.
## Macro title: Squore Dashboard Element Importer
## Macro category: External Content
## Macro has a body: N
## Body processing: No Body
##
## Developed by: Squoring Technologies
## Date created: 2013/07/28

## @param squrl:title=Squore Server URL|type=string|required=true|desc=The Squore Server URL
## @param sqport:title=Squore Server Port|type=string|required=true|desc=The Squore Server Port
## @param chart:title=Squore Element URL|type=string|required=true|desc=The URL of the Squore Dashboard Element
## @param sizex:title=Squore Element Width|type=string|required=true|desc= The Squore Element Width
## @param sizey:title=Squore Element Height|type=string|required=true|desc= The Squore Element Height
## @param version:title=Version|type=enum|enumValues=Current version,Last draft,Last baseline|default=Current version
#if ("Last draft"==$paramversion)
    #set($pversion="?version=last")
#elseif ("Last baseline"==$paramversion)
    #set($pversion="?version=last-baseline")
#else
    #set($pversion="")
#end
#set($login=$action.remoteUser.name)
<IFRAME frameborder="0" src="$paramsqurl:$paramsqport/SQuORE_Server/XHTML/Navigation/ChartExport.seam?user=$login&width=$paramsizex&height=$paramsizey&chart=$paramchart$pversion" scrolling="no" width="$paramsizex" height="$paramsizey">
</IFRAME>
The macro you added in the previous section should be available to other Confluence users as the form show below from External Content.
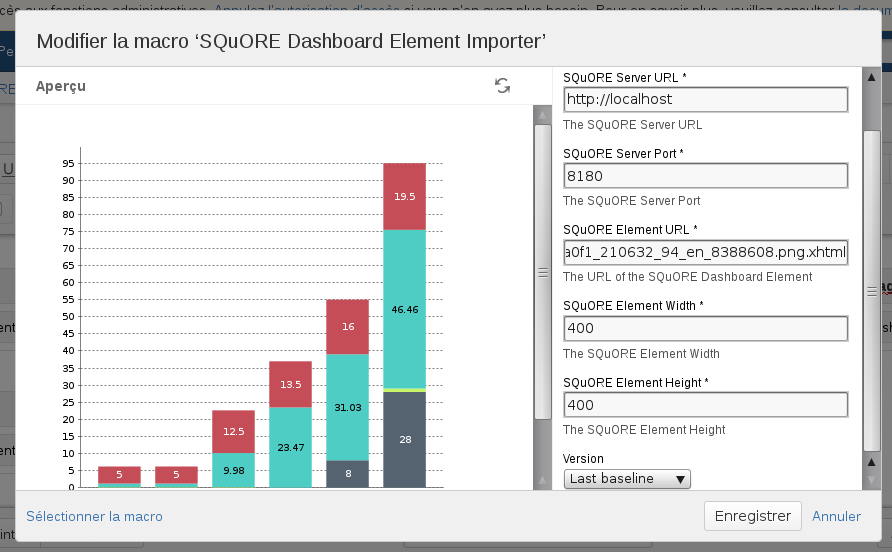
The Confluence Squore form
Users need to fill in the following details:
the Squore Server URL
the Squore Server port
the chart permalink (as retrieved according to the instructions in the section called “Embedding Dashboard Elements”)
the desired width of the chart
the desired height of the chart
the version of the chart to display (exact, last or last baseline)
You can either link to the chart URL ending in .png.xhtml or .xhtml. Using the link to the xhtml page allows you to display the chart's tooltips in Confluence, but the size of the iframe in Confluence has to match the size of the original chart in Squore. Using the link to the png loses the tooltips, but allows you to set a different width and height than specified in the Squore dashboard.
You can add several charts on the same Confluence page.