| Installation and Administration | Getting Started | Command Line | Configuration | Eclipse Plugin | Reference Manual |
| Show on single page Show on multiple pages |
|
|
|
|
Creating a project in Squore is as easy as following a wizard that will prompt you for information about the source material to analyse, and the external Data Providers to add to the analysis results.
The example below assumes that the source code for the sample project used is available on a network share. The path to the source files to analyse is relative to the server.
In order to create a project for the sample application Neptune2, follow these steps:
Access
http://localhost:8180/SQuORE_Server
in your browser.
The log-in page appears.
Log in as the demo user with the login/password combination
demo/demo.
Click the Login button. You are presented with the Squore home page.
Click Projects to switch to the projects view and click Create Project to create the Neptune2 project.
The General Information screen appears.
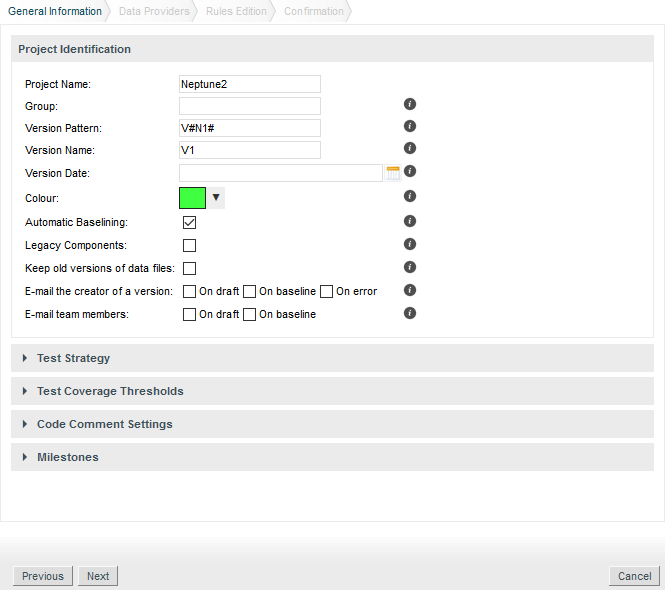
The General Information screen
If your Squore installation has been customised to provide more than one project wizard, you will see a Wizard Selection screen where you can choose which project wizard to follow. Project wizards allow you to use different analysis models and tools to analyse your projects. For this demo, click the Software Analytics wizard to start creating the project.
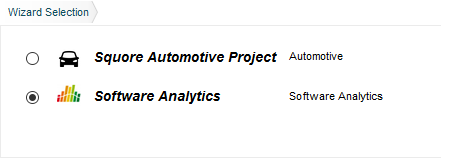
The Wizard Selection screen
On this screen, you can enter the information relative to your project in the Project Identification section
The Version Date field allows specifying a custom date for the analysis, so that different analyses can be placed correctly on a timeline later for certain charts in the dashboard. If you leave it empty, then the actual time at which you are running the analysis is used.
The Software Analytics model offers extra parameters below the Project Identification section, but you can ignore them for now.
Click the Next button. The Data Providers screen is shown:
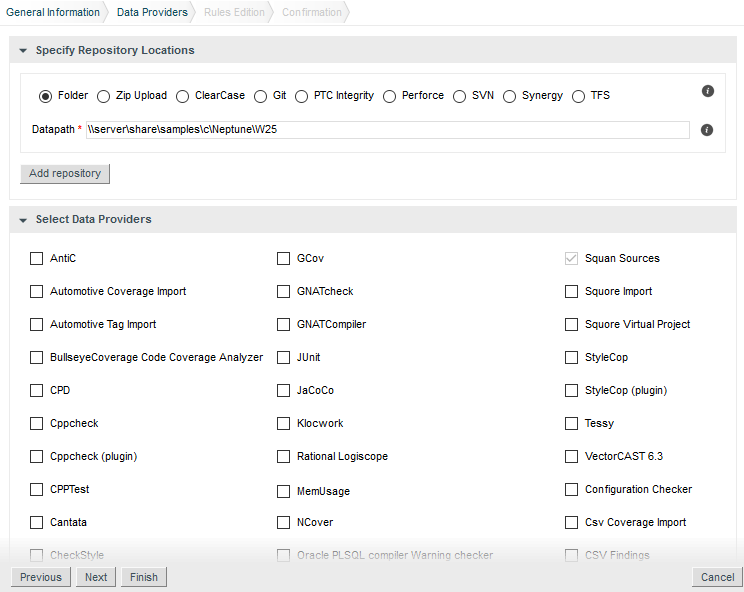
The Data Providers options screen
This screen allows configuring the repository locations and tools that will be used in your analysis.
Set the source code files option to Folder. In the Datapath text box,
type the path to the Neptune2 source code: \\server\share\samples\c\Neptune\W25.
The only Data Provider used in our analysis is Squan Sources, the source code analyser, so you can leave all the other tools unchecked.
If you want to learn more about the available Repository Connectors and Data Providers, consult Chapter 11, Repository Connectors and Chapter 12, Data Providers .
In the Squan Sources parameters, ensure that C is one of the programming languages selected, as shown below:

The Squan Sources Data Provider parameters
Click the Next button to read the Rules Edition screen. This screen allows you to tweak the ruleset available in the analysis model.

The Rules Edition screen
The table displays the entire model's ruleset, which you can filter and sort by data provider or category. Each rule can be turned on or off, and you can click the Edit button to adjust the categories for each rule. Note that any modifications from the original configuration are displayed with an asterisk.
Click the Next button when you are satisfied with your modifications. Note that your modifications are applied for any subsequent analysis of this project and do not affect other projects using the same model.
This screen may not be enabled in your wizard, as your administrator may have disabled it in your configuration. Your administrator can also decide to make modifications to the ruleset that apply to any project created with this model using the Analysis Model Editor. Consult the section called “Analysis Model Editor” and the section called “Using Ruleset Templates” to learn more.
Before launching the analysis, a summary of your selections is displayed. Review the information and click Run to confirm the project creation.
The summary page lists all lists all the options you specified for the project creation and also allows outputting them in various formats so that you can repeat the project creation in command line. For more information about reusing the project parameters in a different context, consult the online help or the section called “Can I Create a Project Via the Command Line?”.
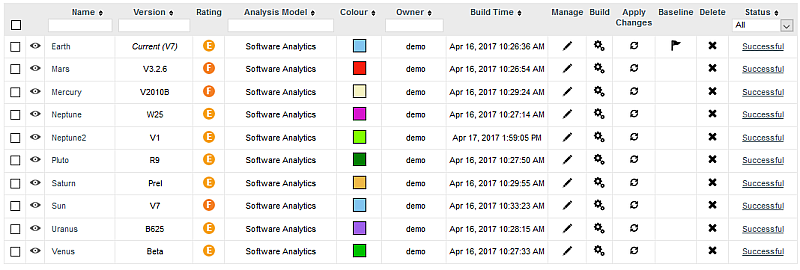
When the project analysis completes, Squore shows you the list of projects. Neptune2 appears in the list, together with information about the current version and its computed rating:
To consult the results of the analysis, click on the project name to view the Squore Dashboard. More information on how to read the Dashboard is available in the section called “Where Are My Analysis Results?”.